
Streamline your workflow: how to save images from your website in seconds
From pixel purgatory to digital marketing magic: make your social media content creation easier.

Ah, the joys of digital asset management – or should we say, digital asset mayhem? Picture this: You’re admiring your website, basking in the glow of your online brilliance, when you stumble upon The One. That perfect image you chose with the care of a sommelier selecting a fine wine. It’s there, in all its pixelated glory, but the original file? It’s probably hanging out with your missing socks and all those pens that mysteriously vanish. Your file organization system is less “Marie Kondo” and more “chaotic contemporary art installation.”
Fear not, digital hoarder extraordinaire! We’ve all been there, staring at our screens, wondering why Past Us didn’t create a foolproof organization system. (Spoiler alert: Because Past Us was too busy binge-watching cat videos. No judgment.)
Maybe you need that image for a snazzy newsletter, or perhaps you’re cooking up a social media post to end all posts. Whatever your grand plans, one thing’s clear: diving into the black hole that is your file storage is about as appealing as a root canal performed by a squirrel.
But wait! Before you resign yourself to hours of frustrated clicking through mysteriously named folders (“New Folder (7)”, anyone?), we’ve got a life hack that’ll make you feel like a tech wizard. We’re about to reveal two magical methods to pull those elusive photos straight from your website, faster than you can say “Where did I put that file?”
So, buckle up! It’s time to bypass your questionable filing system and snag those images directly from your Dirigible website. Get ready to save time, sanity, and possibly your computer from being hurled out the window in frustration. Let’s dive in and turn you into an image-retrieving wizard!
Don’t violate or you’ll get violated

Before we dive into the nitty-gritty of image-snatching techniques, let’s have a quick chat about the elephant in the room: copyright. We don’t want you accidentally turning into an outlaw in the Wild West of the web. So, remember to tip your hat to copyright laws when using saved images for your own shenanigans. Think of it as the “golden rule” of the internet – if you wouldn’t want someone swiping your masterpiece, don’t go around lassoing others without permission.
tl/dr – don’t steal other people’s photos.
PS – we’ve got a round up of our favorite stock photo sites right this way…

Method 1
Method 1
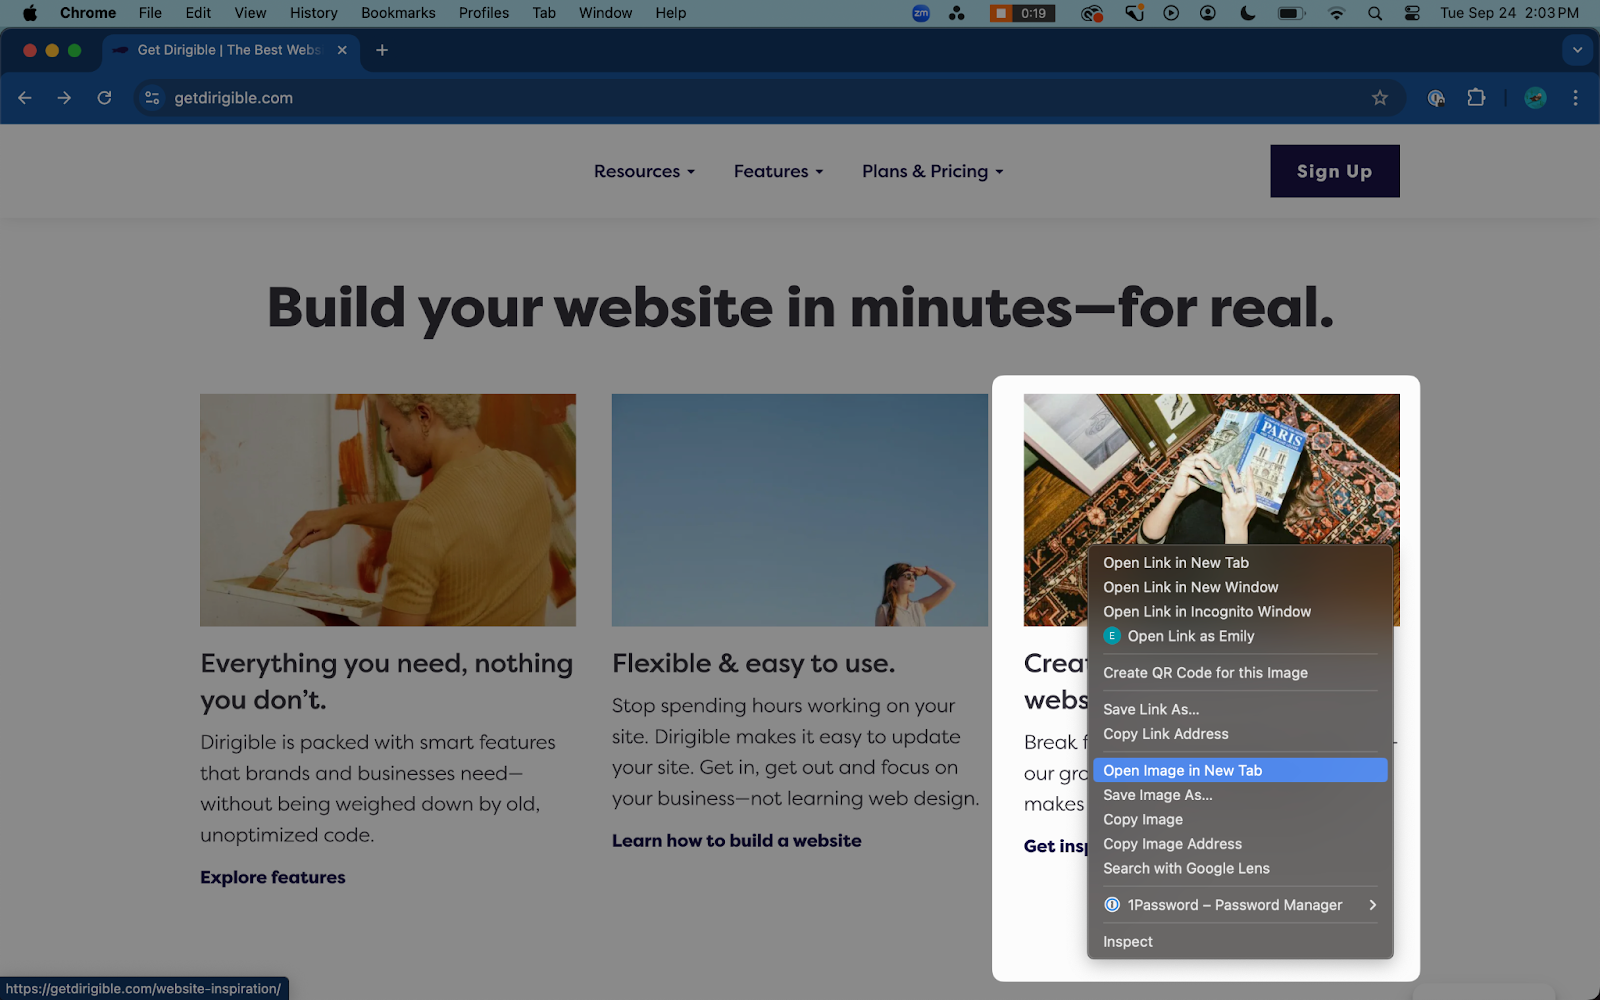
- Locate the image you’d like to save and right click selecting “Open Image in New Tab”

- From the URL of your newly opened tab, you’ll want to remove the photo dimensions (if applicable) and delete “.webp”. Removing the dimensions removes the crop of an image, which restores the images size and quality before you save to your own files. The dimensions often appear after the file name and before the file type (starting with “-” and ending just before the period) Deleting “.webp” ensures that when you go to save the graphic it is not being saved as a webpage.
- https://cdn.dirigible.studio/wp-content/uploads/sites/4/2022/07/16124038/DTS_Staycation_Mathew_Addington_2511
-768×512.jpeg.webp- Looking at the above example, you’d remove the strikethrough portions of the URL to end up with: https://cdn.dirigible.studio/wp-content/uploads/sites/4/2022/07/16124038/DTS_Staycation_Mathew_Addington_2511.jpeg
- https://cdn.dirigible.studio/wp-content/uploads/sites/4/2022/07/16124038/DTS_Staycation_Mathew_Addington_2511

- Lastly, right click on the image once again and select “Save Image As…” saving the image to your files and renaming however you’d like.
Method 2 (Another Option for Mac Users)
Method 2 (Another Option for Mac Users)

- Locate the image you’d like to save and right click selecting “Save Image As…”
- After saving your image, locate it in your finder. It will be saved as a .webp file. In this example, I saved the file to my downloads under the name “Saved Image”.

- After locating you image, right click > Quick Actions > Convert Image
- From here you can change the format of your .webp file as well as the size.
- Note: this method doesn’t restore the image’s original dimensions if it has been cropped, which might decrease the image quality when you go to save. Follow Method 1 above to remove an image’s resized dimensions.
This approach is ideal for businesses who like their website’s look and content but are struggling with technical issues. It’s a fast and easy way to improve your site’s performance without starting from scratch.
And there you have it, digital dynamos! You’ve just leveled up from frazzled file fumbler to slick image-snatching sensation. With these tricks up your sleeve, you’re now equipped to pluck those perfect pixels from your website faster than you can say “social media scheduling.”
Gone are the days of excavating through digital debris or playing detective with your own filing system. You’re no longer at the mercy of your past self’s questionable organizational choices. Instead, you’re a lean, mean, image-retrieving machine, ready to conquer the digital marketing world one swift save at a time.
Remember, with great power comes great responsibility (and hopefully, some killer content). Use your newfound skills wisely, always keeping copyright considerations in mind. Now go forth and dazzle the digital realm with your lightning-fast image retrieval and social media savvy!
Who knows? You might just find yourself with enough spare time to finally organize those files. Or, let’s be real, to watch more cat videos. We won’t judge – we’ll be too busy admiring your streamlined workflow and envy-inducing social media feed. Now, if you’ll excuse us, we have some images to save and a New Folder (8) to create.