Help! My Image Uploaded Sideways!
How to fix image rotation issues in WordPress / Dirigible

It can be frustrating and especially irritating when something as simple as uploading a photo to your site isn’t displaying how you want it to. When uploading your photos they sometimes show up flipped or incorrectly oriented in the WordPress media library. But don’t worry, it is fixable!
Why does this happen?
Images may sometimes upload sideways in WordPress due to issues with the image’s metadata, specifically the EXIF (Exchangeable Image File Format) data. This data can include details such as the camera model, settings, and the camera’s orientation when it took the photo.
Many modern smartphones and digital cameras automatically include this orientation data. For example, if you take a photo vertically with your camera, then the EXIF data will note that the image should be displayed rotated by 90 or 180 degrees. This is why when you are scrolling through your photo library on your phone or computer, all the images are displayed upright no matter what orientation they were taken in (landscape or portrait).
WordPress tries to respect this EXIF data when it generates thumbnails for your image and the original image file remains unrotated. So if your web browser doesn’t correctly interpret the orientation metadata or if WordPress can’t properly read this data during upload, the image could appear sideways or upside-down when you upload it. The good news is, there are simple edits you can make to your image to make sure it displays correctly in the WordPress Media Library and on your site.

Here are two ways you can fix your image rotation issues:
1. Manually rotate your images with photo editing software
One way to prevent your photos from uploading incorrectly is to open the image in a photo editing software and manually rotate it to the correct orientation. When saved, the photo editing software will remove or update the rotation/orientation metadata and can prevent the image from appearing sideways in WordPress.
Professional Image Editing Programs:
Adobe Photoshop is the industry standard for professional image editing. It offers an extensive range of tools, features, and compatibility with various formats and plugins.
Adobe’s Lightroom is a cloud-based service that provides everything you need to edit, organize, store, and share your photos across desktop, mobile, and web.
Affinity Photo offers powerful tools, incredible performance, and a slick, user-friendly interface. It’s a great alternative to Photoshop with a one-time payment rather than a recurring subscription.
Capture One is a professional RAW converter offering you ultimate image quality with accurate colors and incredible detail from more than 400 high-end cameras.
DxO PhotoLab provides a complete set of smart assisted corrections that you can manually fine-tune at any time. It has powerful and automatic editing tools.
*Please note that these software programs are not free. They range from relatively affordable to professional-grade with corresponding pricing. Always make sure to download software from the official website or a trusted source to avoid malware or unwanted software.*
Free or Open Source Image Editing Programs:
GIMP (GNU Image Manipulation Program)
GIMP is a powerful and versatile open source image editor. It is highly customizable and has a wide range of tools.
Originally intended as a free replacement for the Microsoft Paint software, Paint.NET has grown into a full-featured image editing program.
Pixlr offers a set of intuitive tools and a clean user interface. It is web-based, so you don’t need to download anything.
PhotoScape is a fun and easy-to-use photo editing software that enables you to fix and enhance photos. It includes a wide range of tools and features.
Krita is a professional free and open source painting program. It is made by artists that want to see affordable art tools for everyone.
*Remember that while these programs are free, some may offer additional features or ad-free versions for a fee. Always make sure to download software from the official website or a trusted source to avoid malware or unwanted software.*

2. Use the Image Editor On Your Website’s Back End
After uploading your image in the WordPress media library, you can manually rotate it in the WordPress Image Editor.
- Login to WordPress:
- Enter your username and password to log in to your WordPress dashboard.
- Open Media Library:
- On the left hand side, in your dashboard, click Media > Library.
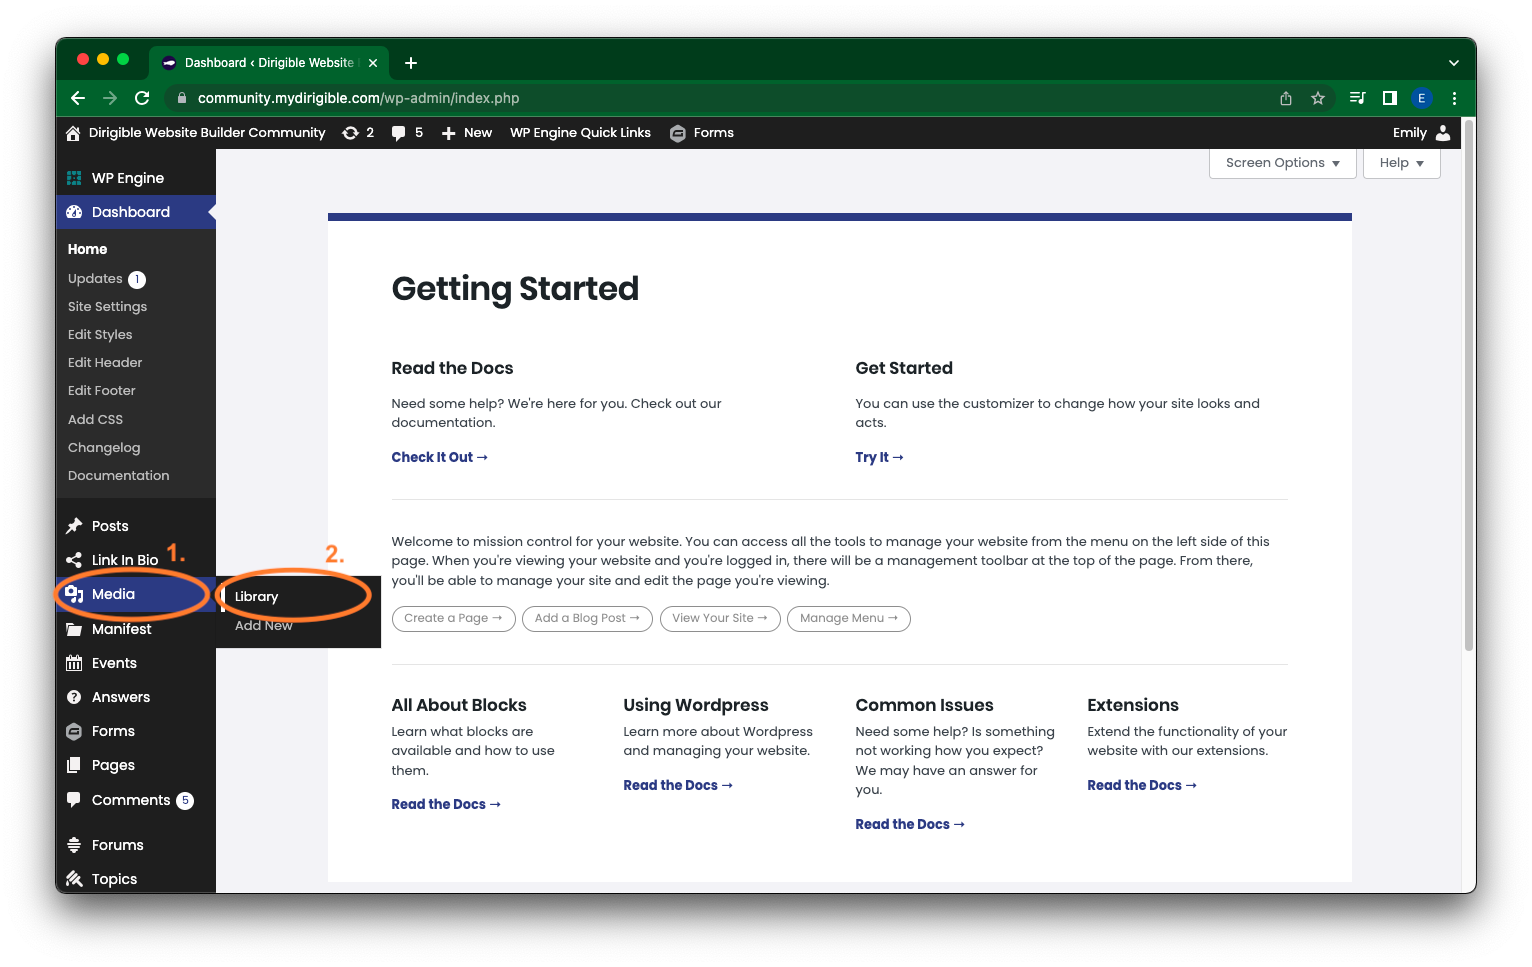
- Select the Image:
- Browse or search for the image you want to rotate and click on it. This will open the Attachment Details window.
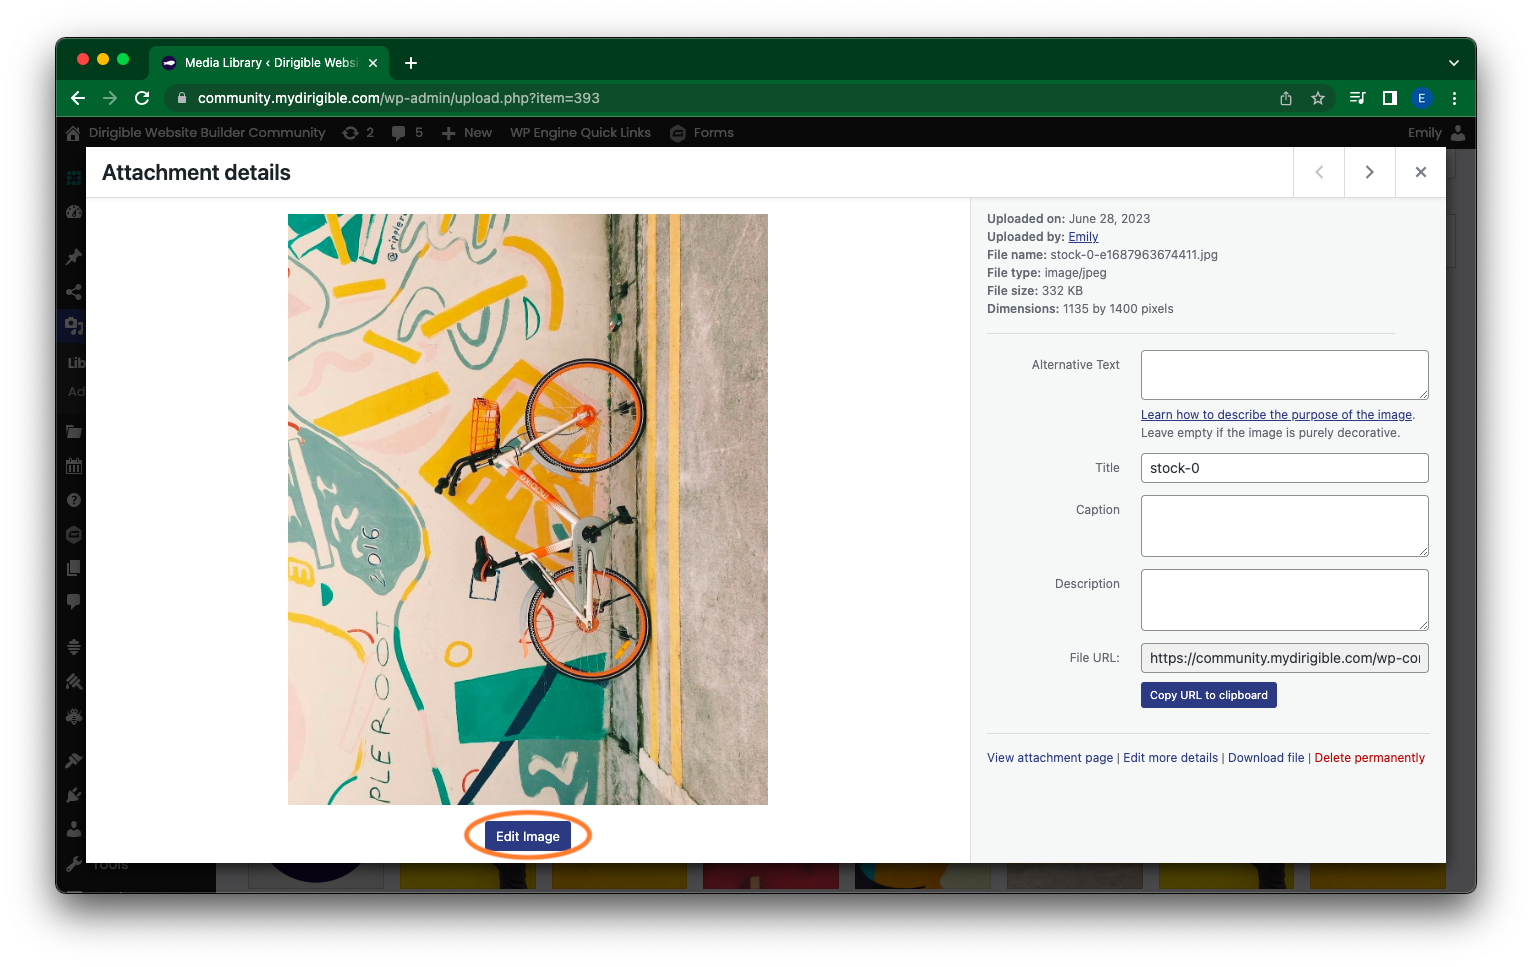
- Edit the Image:
- In the Attachment Details window, click on the Edit Image button below the photo. This will open the image editing screen.
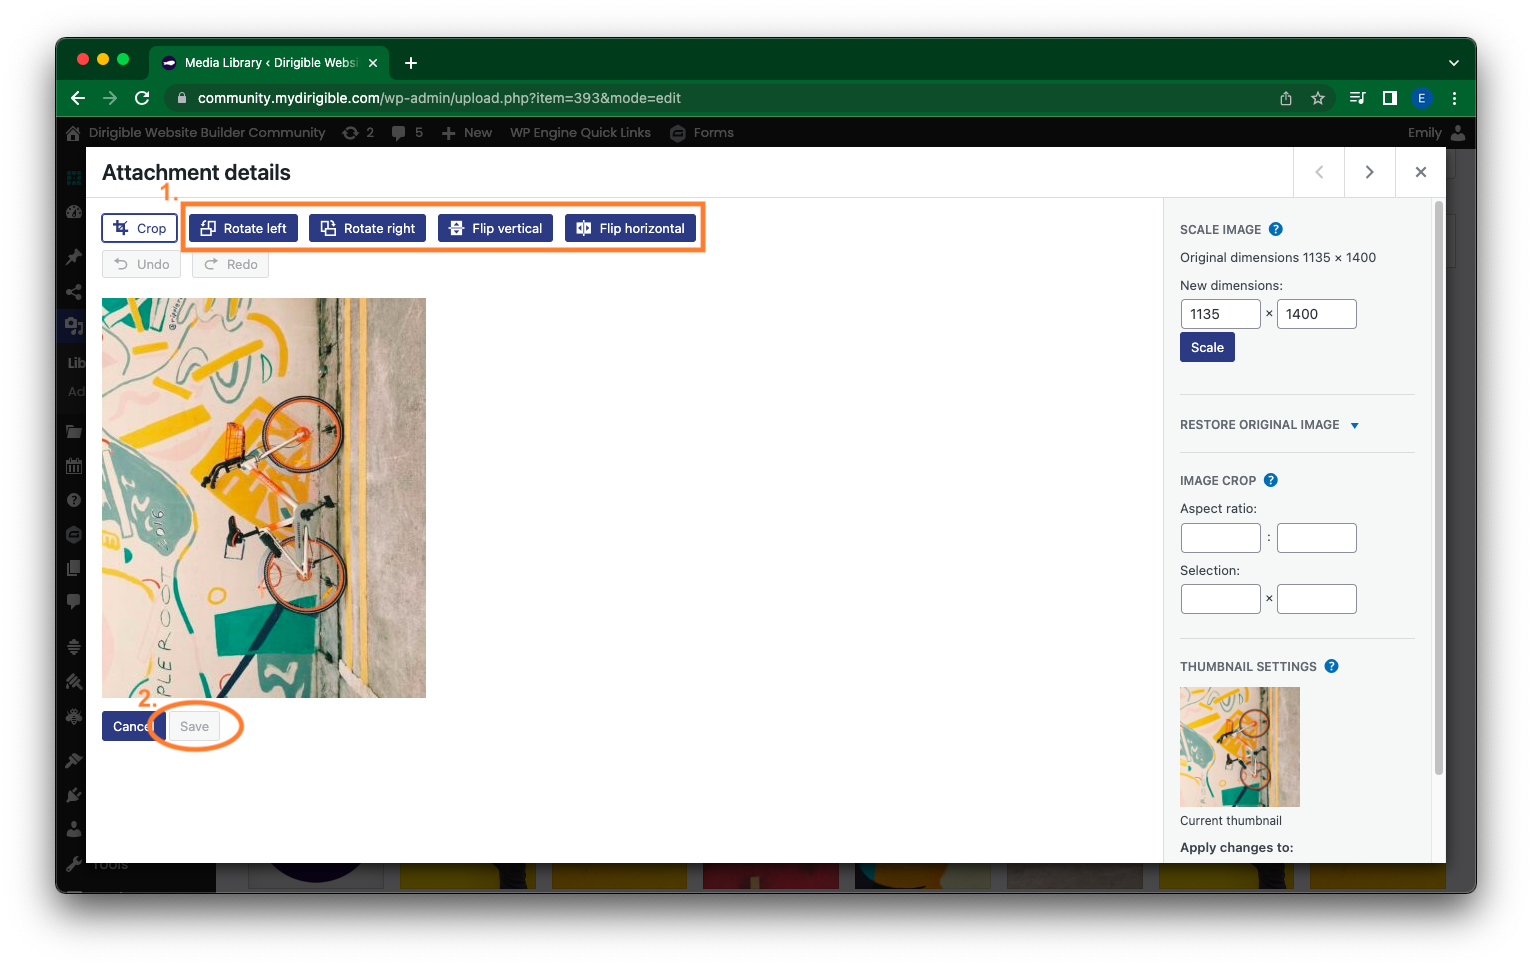
- Rotate the Image and save:
- At the top of your photo, there are Rotate left, Rotate right, Flip vertical, and Flip horizontal options. Use those to edit your image and get it oriented the way you want. When you have your image looking the way you want it, hit save to the bottom left of your photo.
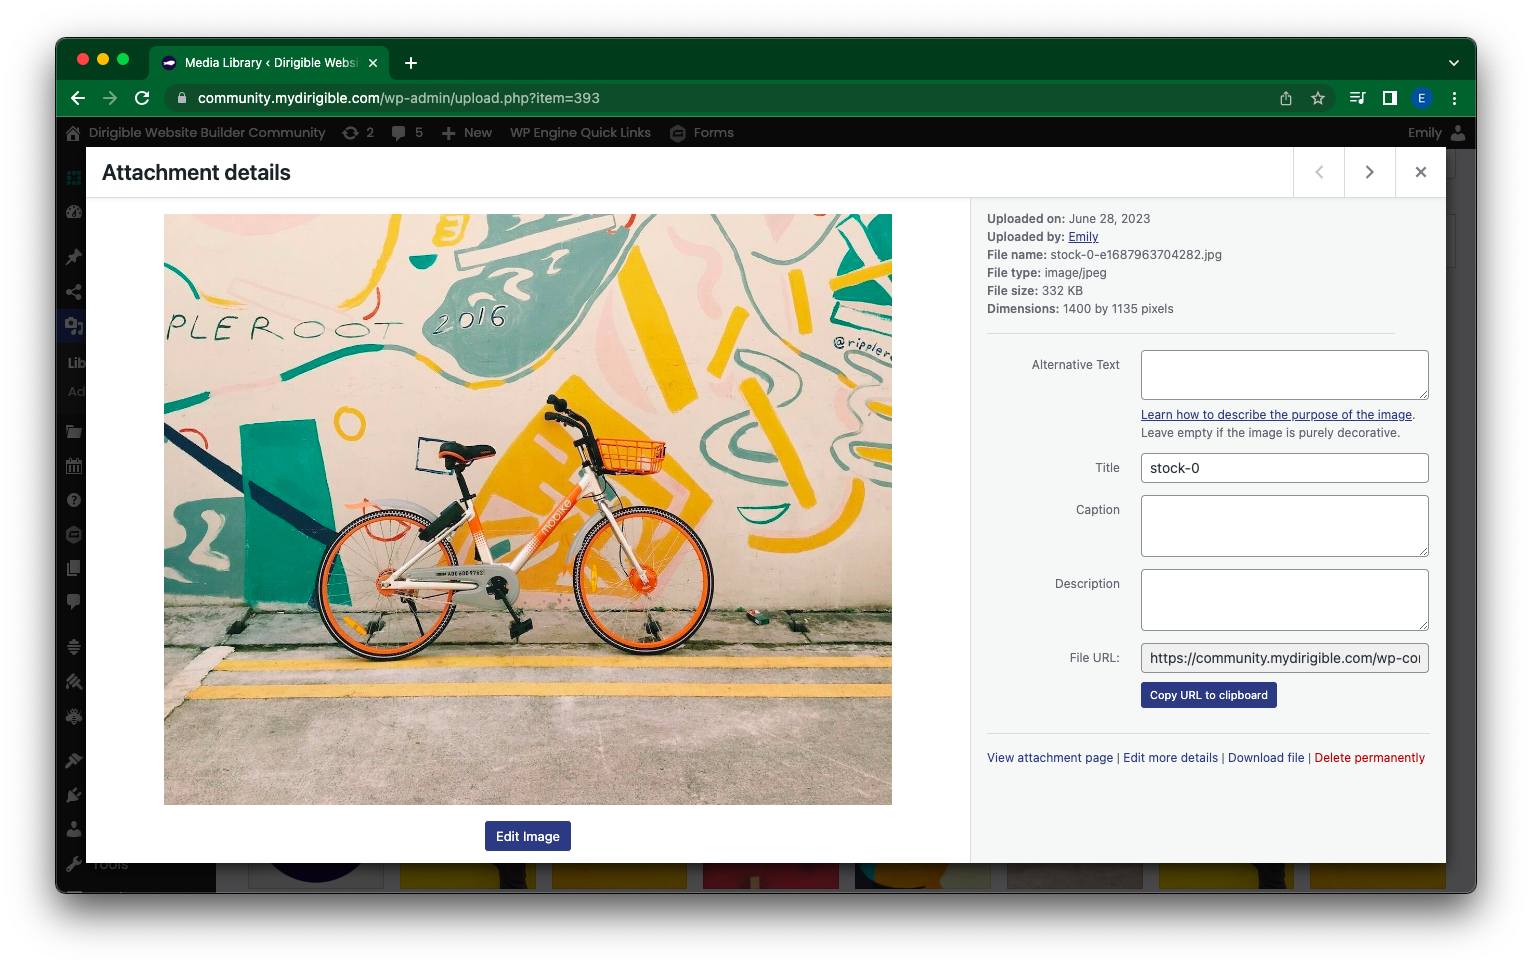
Any changes you make to the image in your media library WILL be applied wherever the image is used on your site. If you only want to rotate the image in one location, consider creating a copy of the image and rotating the copy. It’s always a good idea to back up your original images before you start rotating or modifying them, just in case you need to revert to the original version.

It just takes this little extra step to reorient your photo so that it displays the way you want it. If you see your photo uploads sideways or flipped, utilize this quick and easy fix!
If you found this helpful and want to learn more about using your website and how to market your brand – sign up for our Website Building 101 course with Dirigible!
Published on Jul 18 2023
Last Updated on Mar 18 2024
Categories: News, Web Design, WordPress
Tags: Image Uploads, Website Editing