Setting Up WooCommerce on Your WordPress Site
A Step-by-Step Guide
If you are looking to sell goods or services through your site, an ecommerce plugin is what you need! WooCommerce is a flexible, open-source eCommerce solution built specifically for WordPress. This popular plugin is not only easy to install, but easily customizable to best fit your products as well. Here are the steps to install and setup WooCommerce on your WordPress website.
- Install the WooCommerce Plugin
- While in the backend of your site, from the dashboard go to Plugins > Add New > Search Plugins. Search for “WooCommerce” in the search bar and click Install.
- After installing you’ll have to activate the WooCommerce plugin from your plugins page.
- Setting up WooCommerce
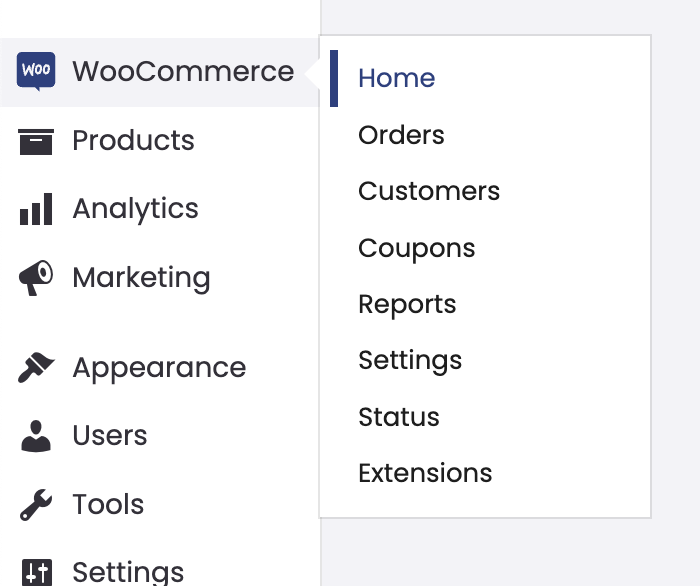
- Once installed and activated, you can access WooCommerce from your site’s dashboard. Go to WooCommerce > Home.
- You’ll be prompted with WooCommerce’s Setup Wizard. Go through these prompts and fields to set up WooCommerce.
–OR–
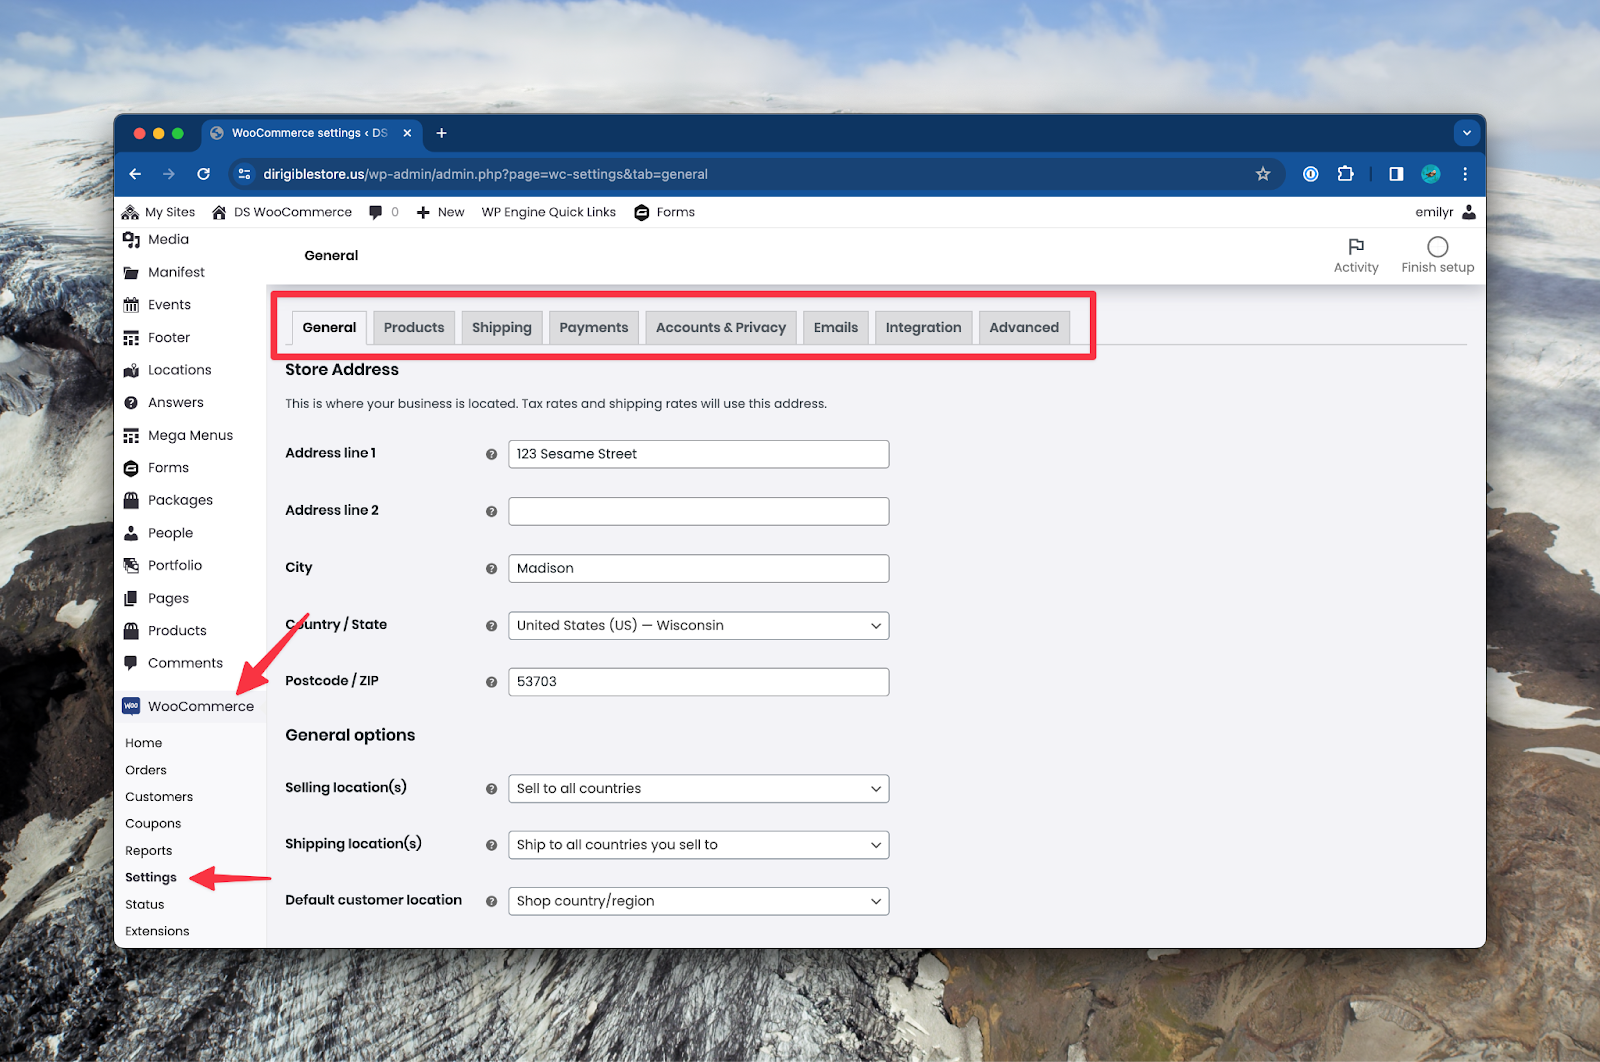
- You also have the option to decline the Setup Wizard and set up your store manually. From the dashboard go to WooCommerce > Settings, and follow the below steps for your initial setup:
Follow these steps for manual set up
- General tab
- Input your Store Address.
- Select and enter your Selling location(s).
- Select and enter your Shipping location(s).
- Select your Default customer location.
- Decide if you want to Enable tax rates and calculations and make your selection.
- Decide if you want to Enable the use of coupon codes and make your selection.
- Decide if you want to Calculate coupon discounts sequentially and make your selection.
- Select your Currency. You have additional options here to customize how pricing shows up on the front end of your site.
- Click “Save Changes”
- Products tab
- Set your Shop page to your published products page.
- Set your preferred unit of Measurements..
- Decide if you want to Enable reviews and Product ratings for your products.
- Click “Save Changes”
- Shipping tab
- Add shipping zones here.
- You’ll have to create shipping methods and shipping classes according to your business.
- Payments tab
- Install, enable, and set up your selected Payment Methods here.
- Click “Save Changes”
- Accounts & Privacy tab
- Establish Guest checkout here (can customers without an account place an order?).
- Additionally make selections regarding personal data retention and prompting for customer account creation at checkout, etc.
- Ensure you have a privacy policy page published and set for appropriate notices to show up for WooCommerce. To check or set a privacy policy page, from the dashboard, go to Settings > Privacy.
- Click “Save Changes”
- Emails tab
- Customize and create your email notifications here.
- Manage email recipients.
- Enter the “From” name.
- Enter the “From” address.
- You have the option to remove the default Woocommerce footer text and enter your own.
- Set your brand colors.
- Decide if you’d like to Enable email insights.
- Click “Save Changes”
- Integration tab
- If you set your Default customer location from the General tab to Geolocate and created a MaxMind account, you’ll paste your MaxMind key in the field here. It can take several minutes to activate.
- Click “Save Changes”
- Advanced tab
- Set your pages and enter endpoints.
- Click “Save Changes”
- You’re all done!
- These settings can be changed or viewed at any time by going to WooCommerce > Settings and navigating to the appropriate tab. Always remember to save any changes!
If you need an e-commerce website to go further, faster—you’re in the right place.
See Dirigible’s Altitude Plan
Published on Apr 09 2024
Categories: Small Business Websites, WordPress
Older Post